
How to Remove Gel Polish with No Damage
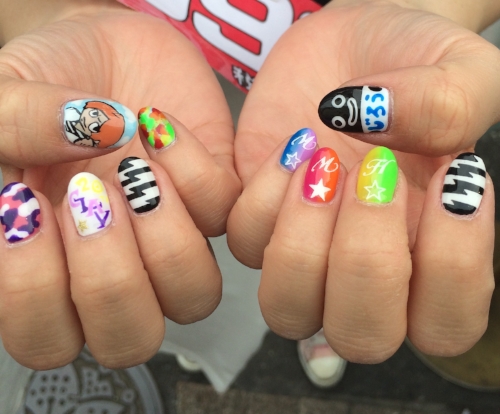
Gel nails I saw on my most recent trip to Tokyo
The amount of times I've heard "I love gel but it damages my nails" is the same number of times I'm met with the sheepish admittance that said gel was peeled off. Come on guys! Would you bleach your hair over and over and never trim it? Of course not. Gel itself does NOT cause damage - the improper application, wear and care, and removal of gel does.
Comparing nails to hair
Just like when you lighten your hair, minimal damage can occur with enhancements. But I said m i n i m a l - barely visible to the naked eye. When you lighten your hair, the keratin is lifted to make it lighter - and we prevent or remedy that little damage to our hair by trimming our split ends (akin to trimming nails), deep conditioning (using cuticle oil daily) and not peeling split ends or never getting a trim (like not peeling off our gel). We would never color our hair over and over again and never trim or condition it - so why are you doing that to your nails?
FAQ: How frequently can I wear gel before giving it a break?
If done properly by a licensed professional and your nails are strong, you really don't need a break. But if you insist, you can do three rounds of gel polish before leaving it off for a few weeks to allow new growth, as gel adheres best to healthy nail plates. Your nails don't "breathe" - instead, they receive oxygen through the blood stream and not the air.
Damage-free gel removal
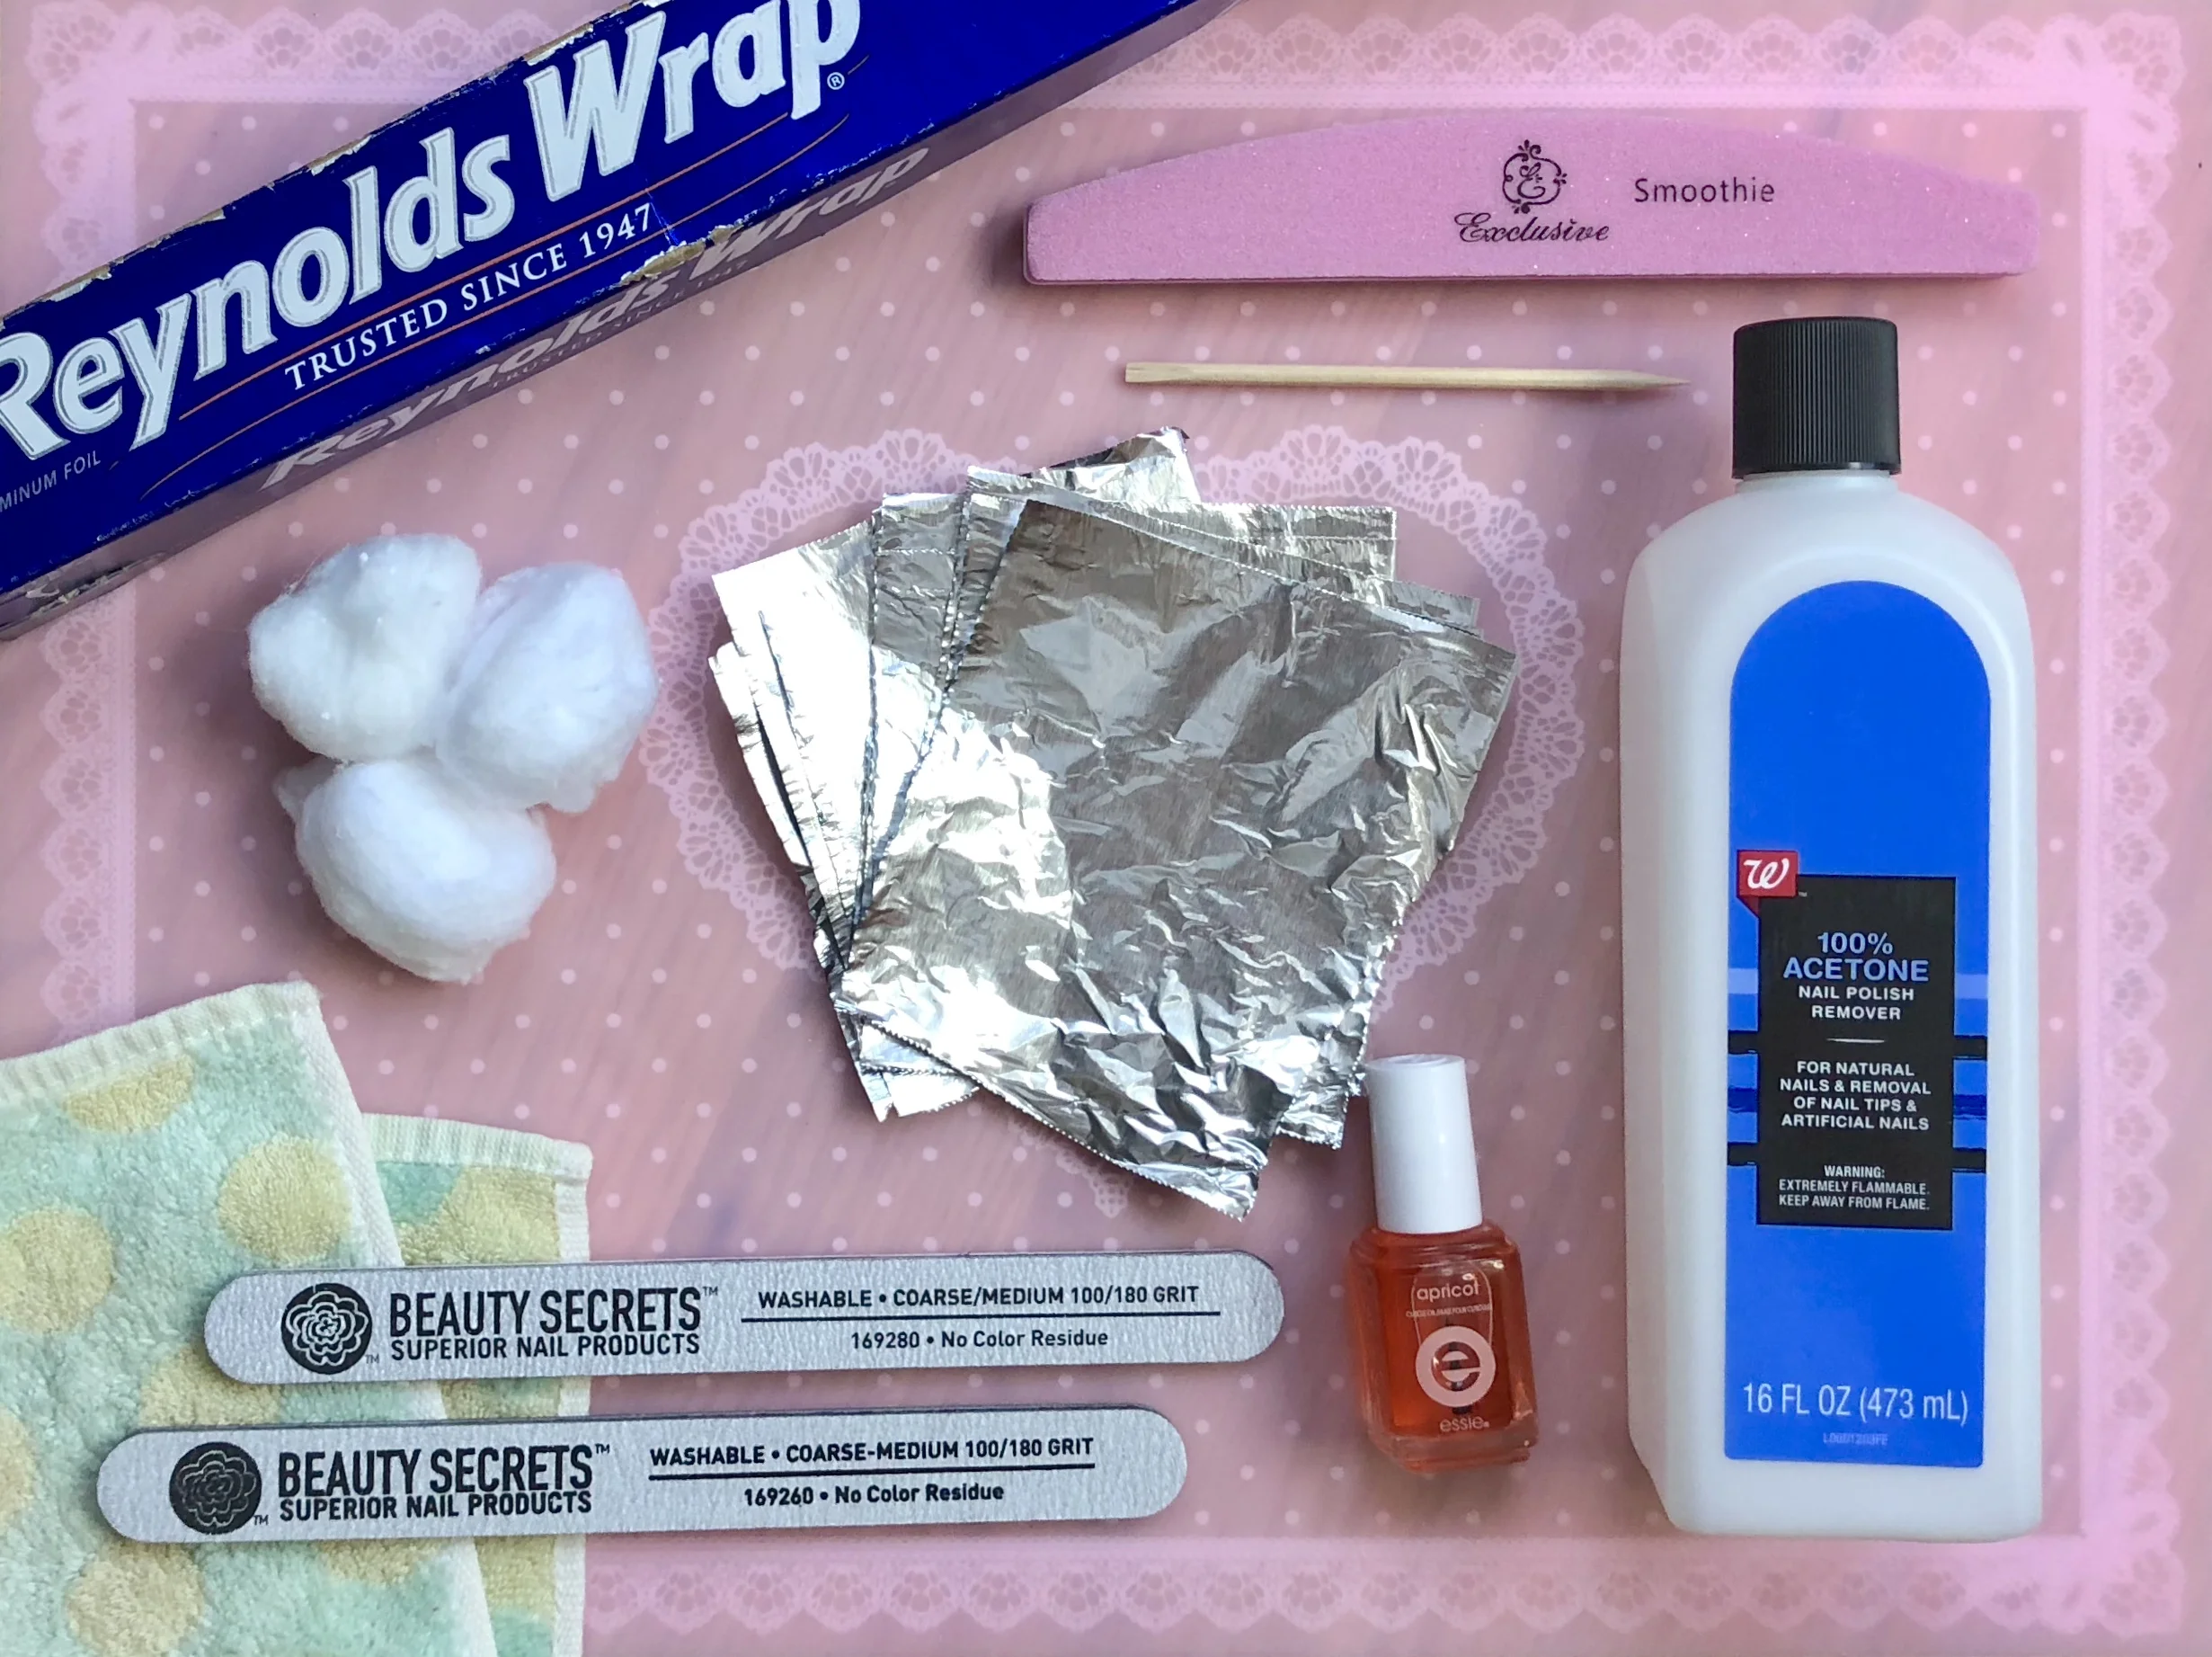
Tools needed for a perfect gel removal:
Pure acetone* (here)
Two 180/180 grit or 100/180 grit files (here)
Padded buffer (here)
Silicone cooking mat (here)
Aluminum foil - not heavy duty! (here)
Cotton balls (not paper towel, tissue or anything lint-free)
Cuticle Oil (here)
Old Towel
Heating pad (optional)
Flat-tipped wooden (not metal) cuticle pusher/orangewood stick (here)
* Some gel products have their own removal products which I recommend instead, if you are sure of the brand that's on your nails. Otherwise, 100% pure acetone will work. Acetone-based polish remover will not work - it must be at least 95% pure acetone.
Steps for a damage-free removal:
1. Use the medium (180 grit) side of the file and remove as much of the top coat as you can. You may have to start with the coarse, 100 grit side depending how thick the gel is. How will you know when the top coat is gone? The color and finish will change. Be sure not to file all the way down to the natural nail though - that's how damage is caused.
2. Repeat on all 10 nails, lay down your silicone cooking mat to protect the table from the acetone
3. Put a good amount of cuticle oil around the cuticle and under the free edge to prevent dehydration of the skin.
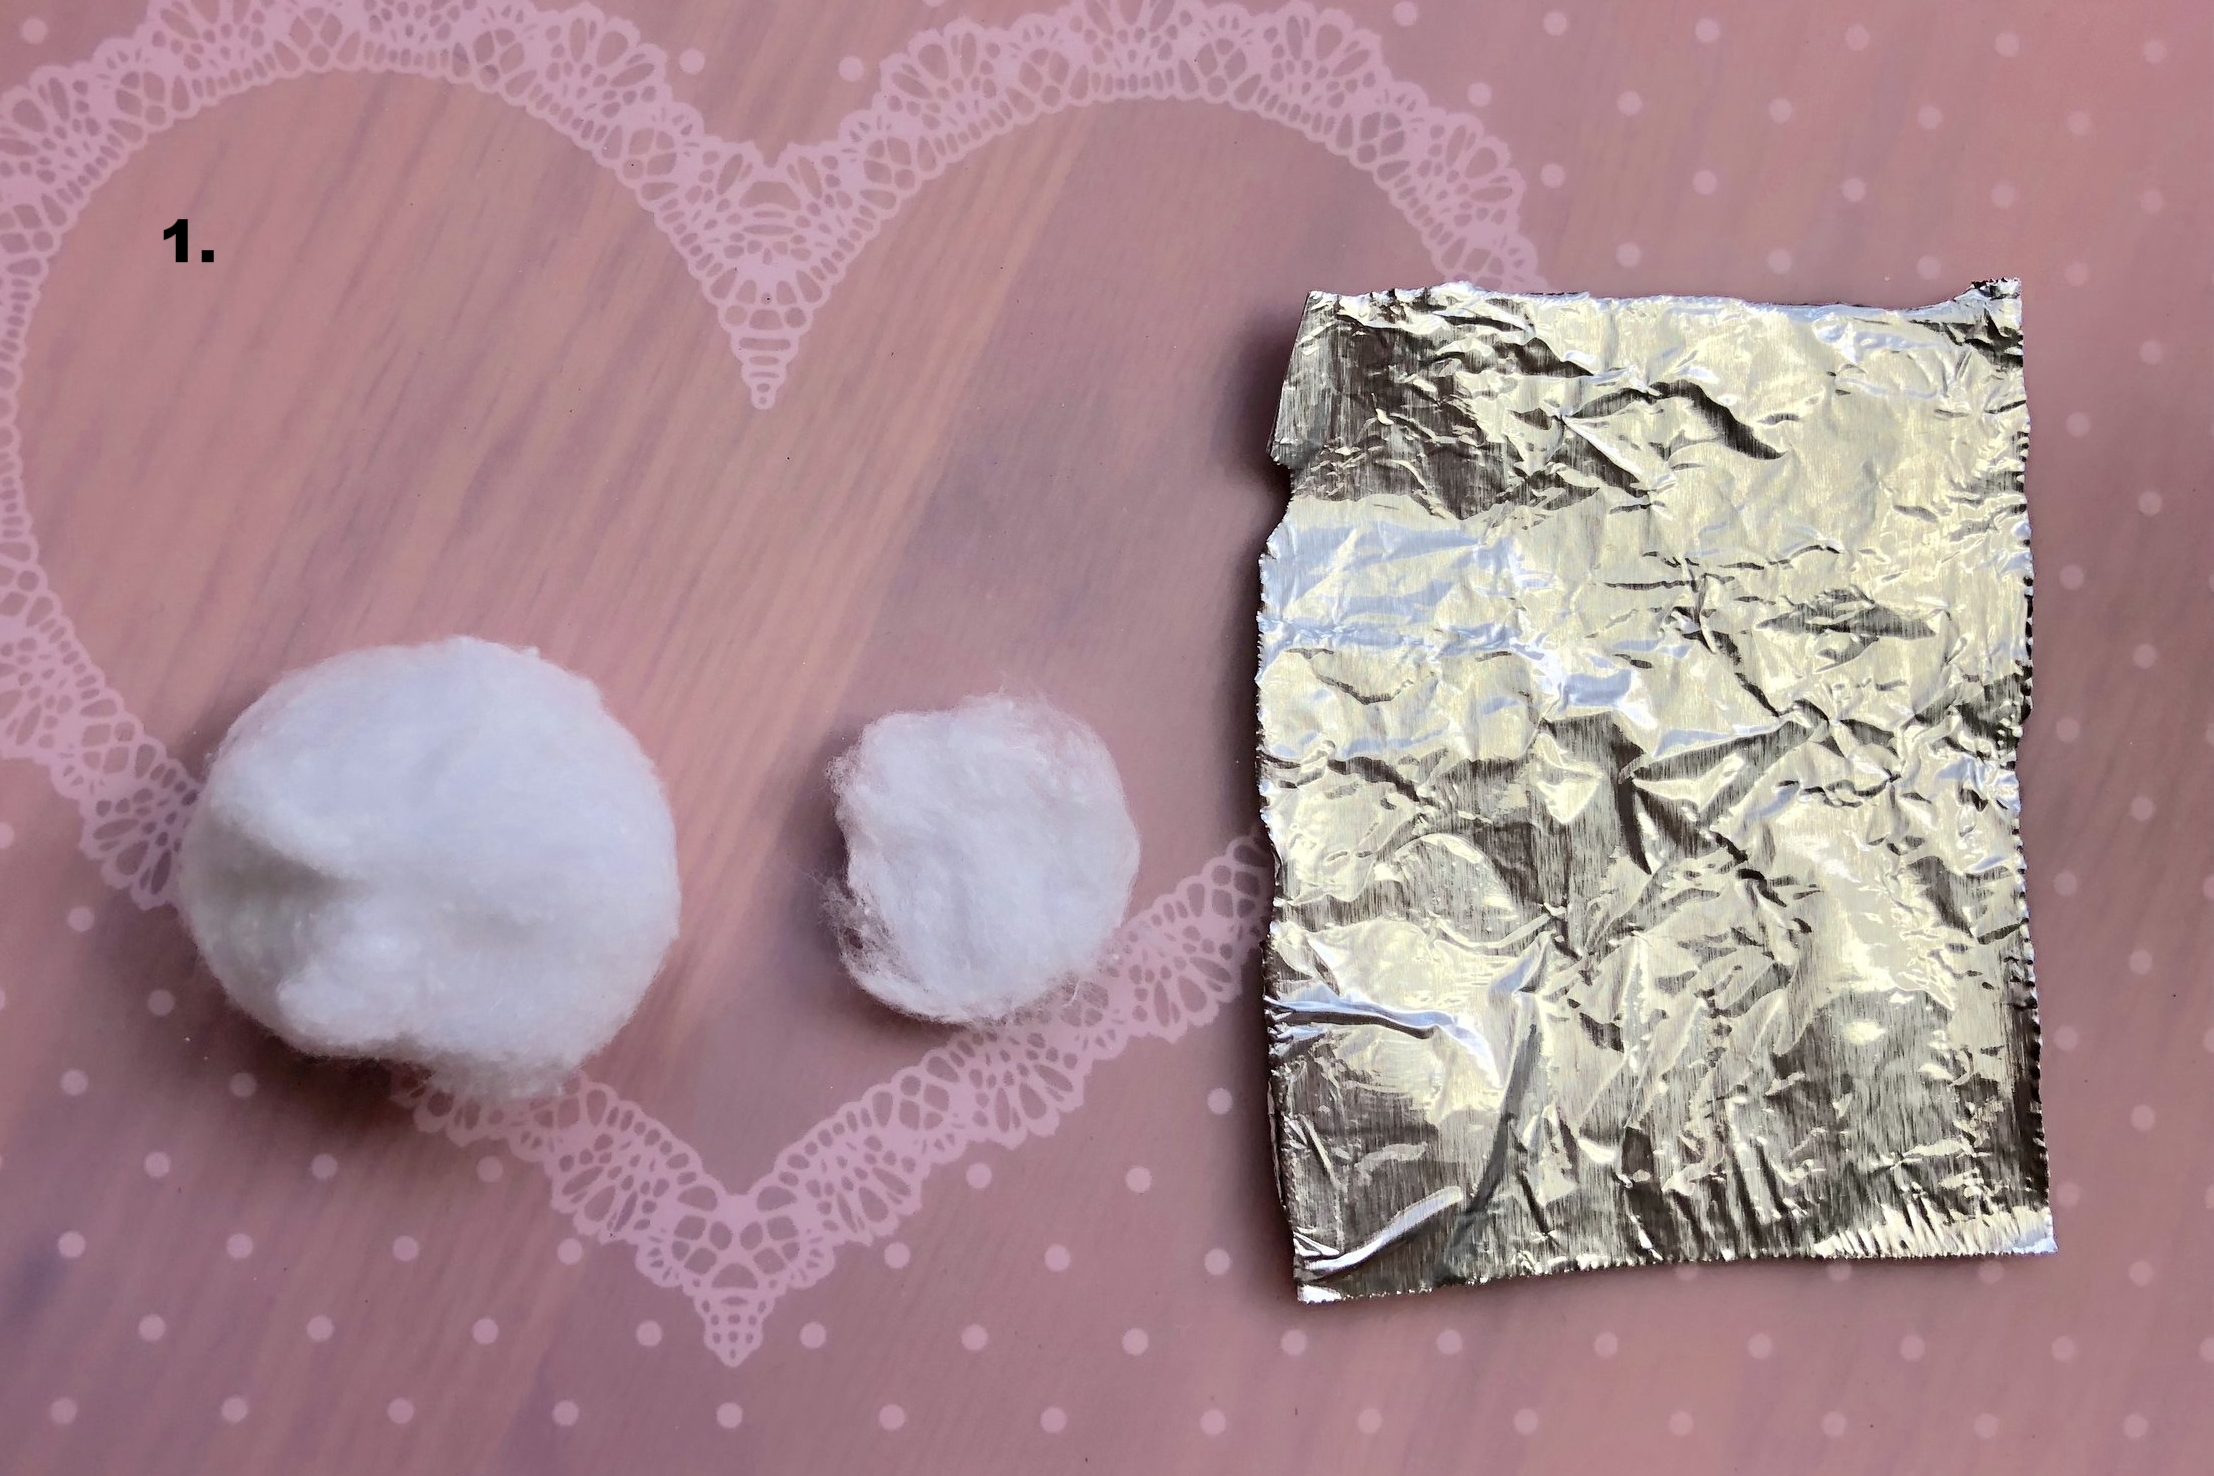
4. Take a small, thin piece of cotton (1/5th of a cotton ball) and completely saturate it with acetone. This is the biggest issue with gel not coming off easily - not getting the cotton soaked enough, and the reason that less-absorbent things like paper towels don't work. JK Beauty Tip: It should be dripping in acetone as it evaporates very quickly.
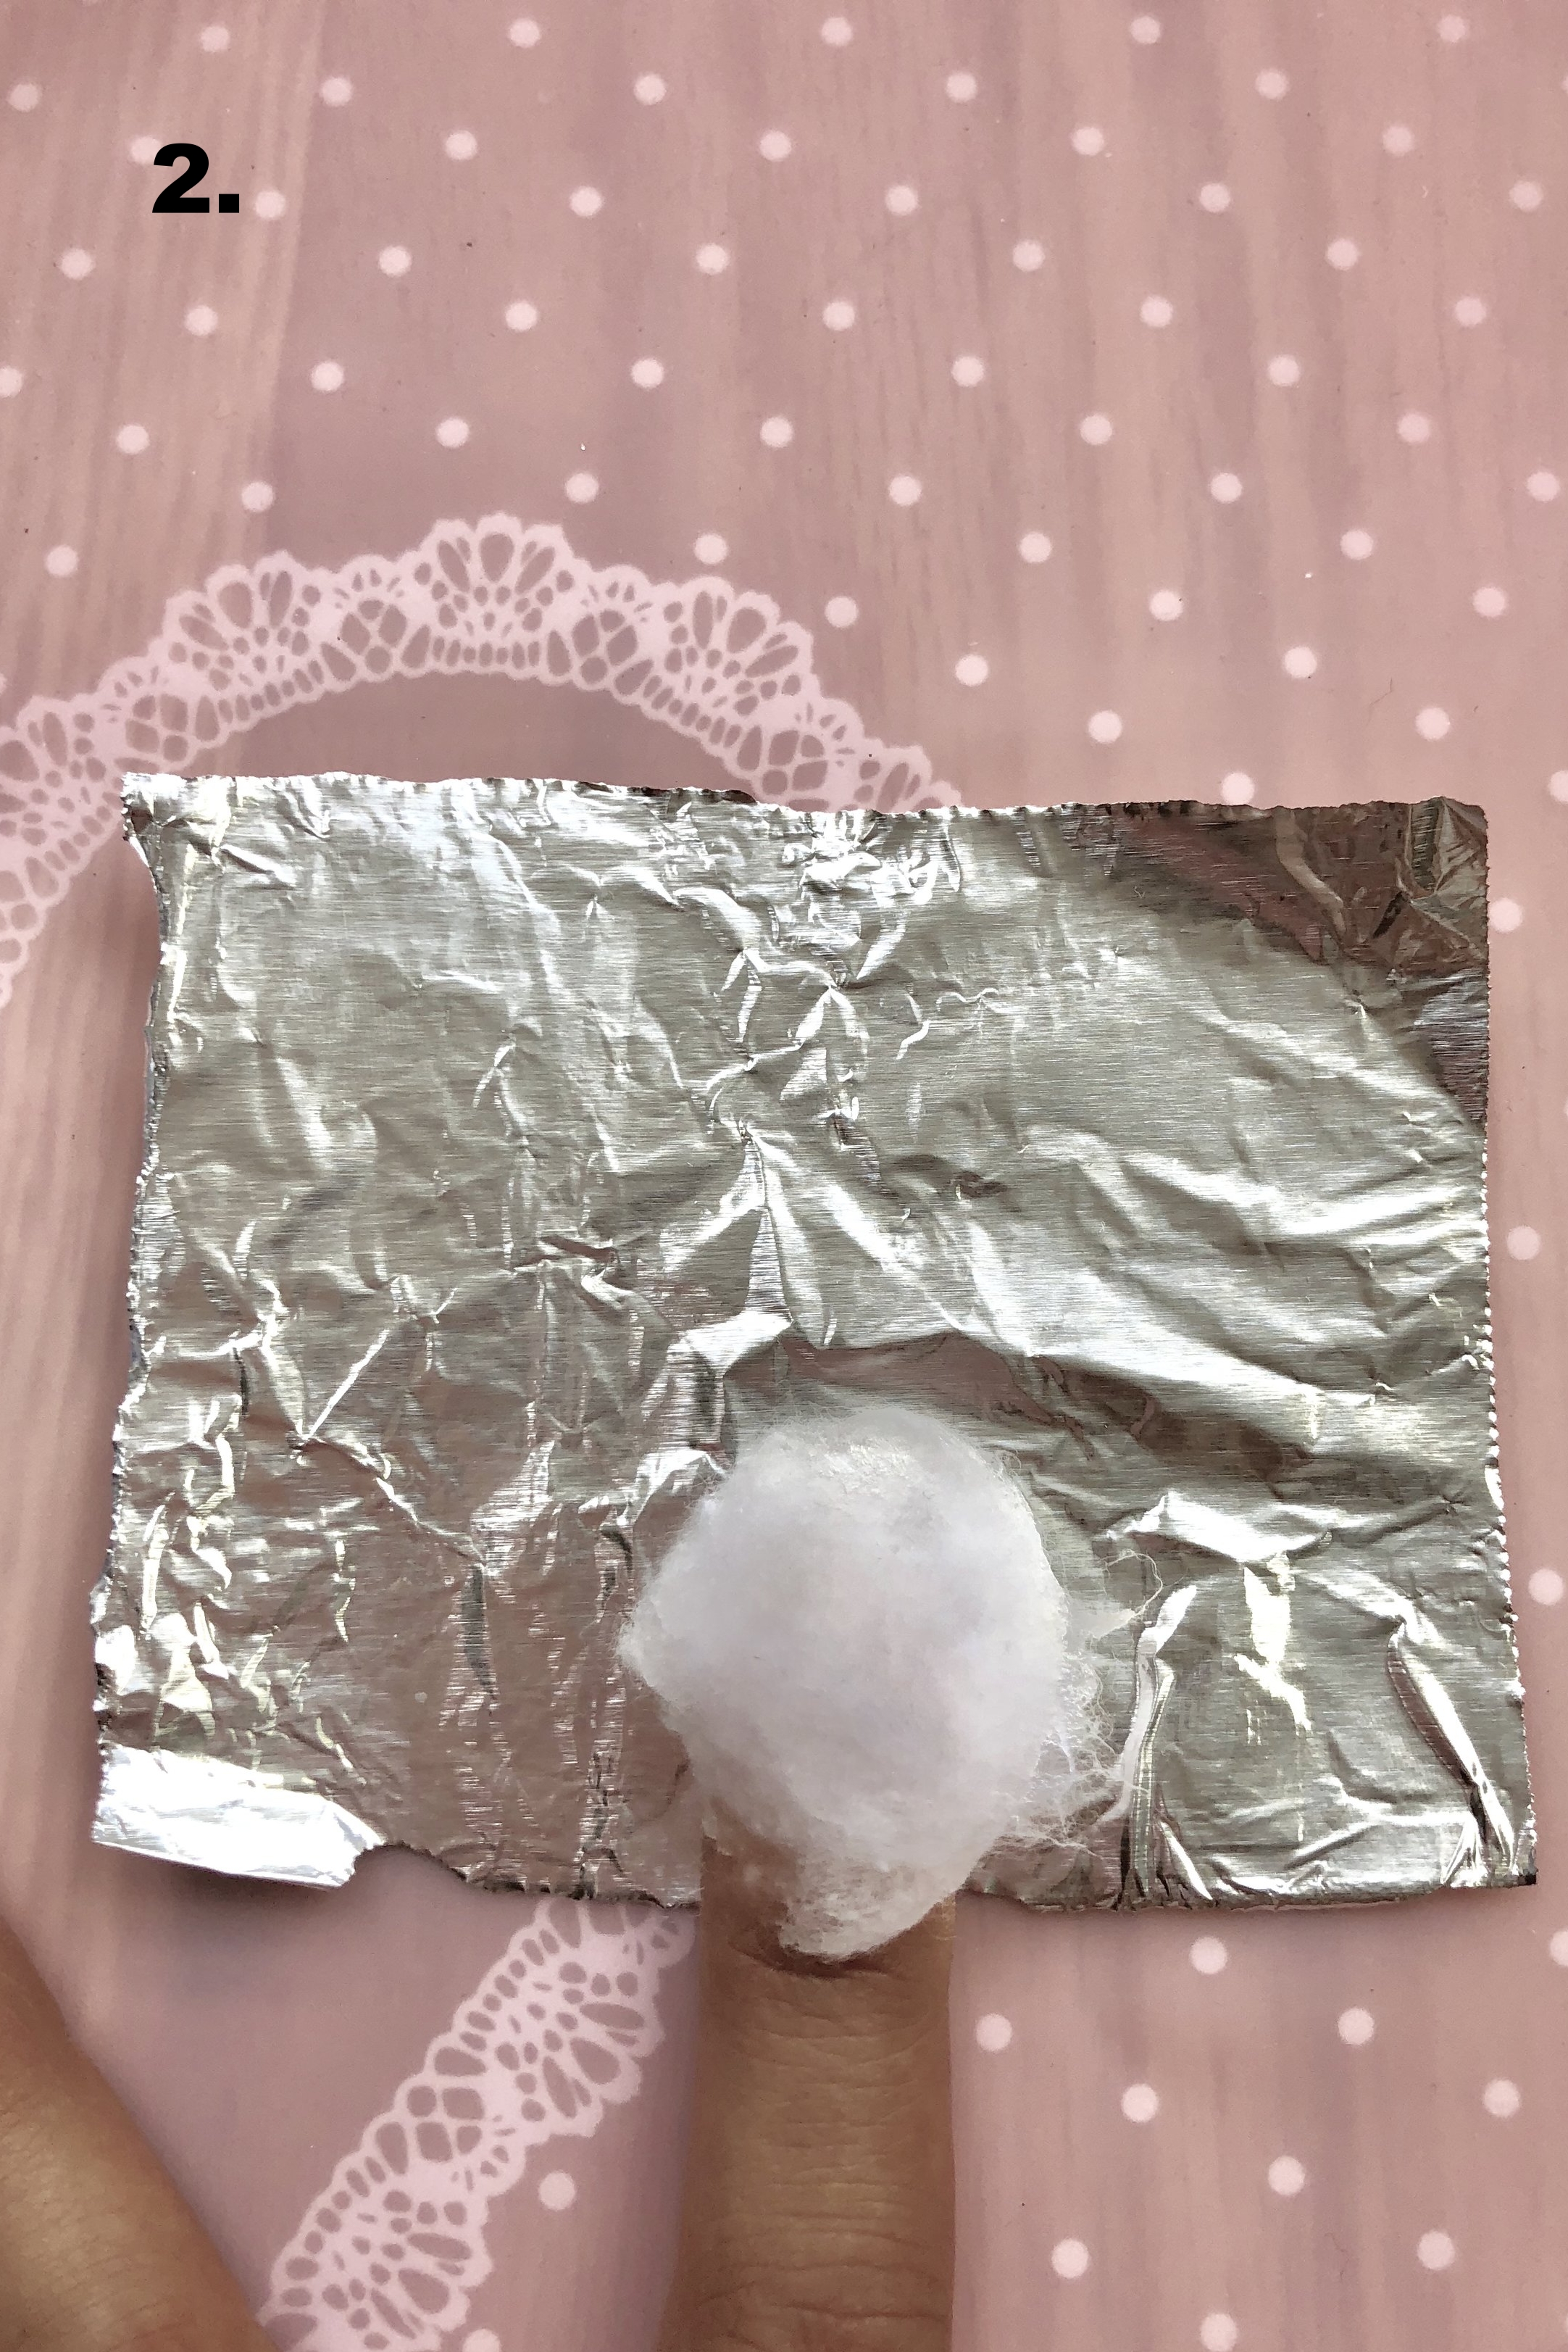
5. Place cotton over nail and wrap it in a 2x2 square of aluminum foil. Fold foil up over tip of finger and then fold the sides in and give it a squeeze to tighten. JK Beauty Tip: Thinner foil is better here as the heavy grilling aluminum foil is too hard to work with on nails.
6. Repeat the cotton and foil wrap steps on the other 9 nails.
7. Place a towel over your hands and relax for 15 minutes. No peeking! The towel holds in the heat that your hands produce, making the acetone work faster. If it's winter or your hands feel cold, you can place a heating pad on low heat under your hands to speed up removal. NEVER heat up the actual acetone as it is flammable!
8. Working one nail at a time, twist and squeeze and pull off the foil. JK Beauty Tip: It's really important that only one foil should come off at a time or the gel can re-harden as the acetone evaporates.
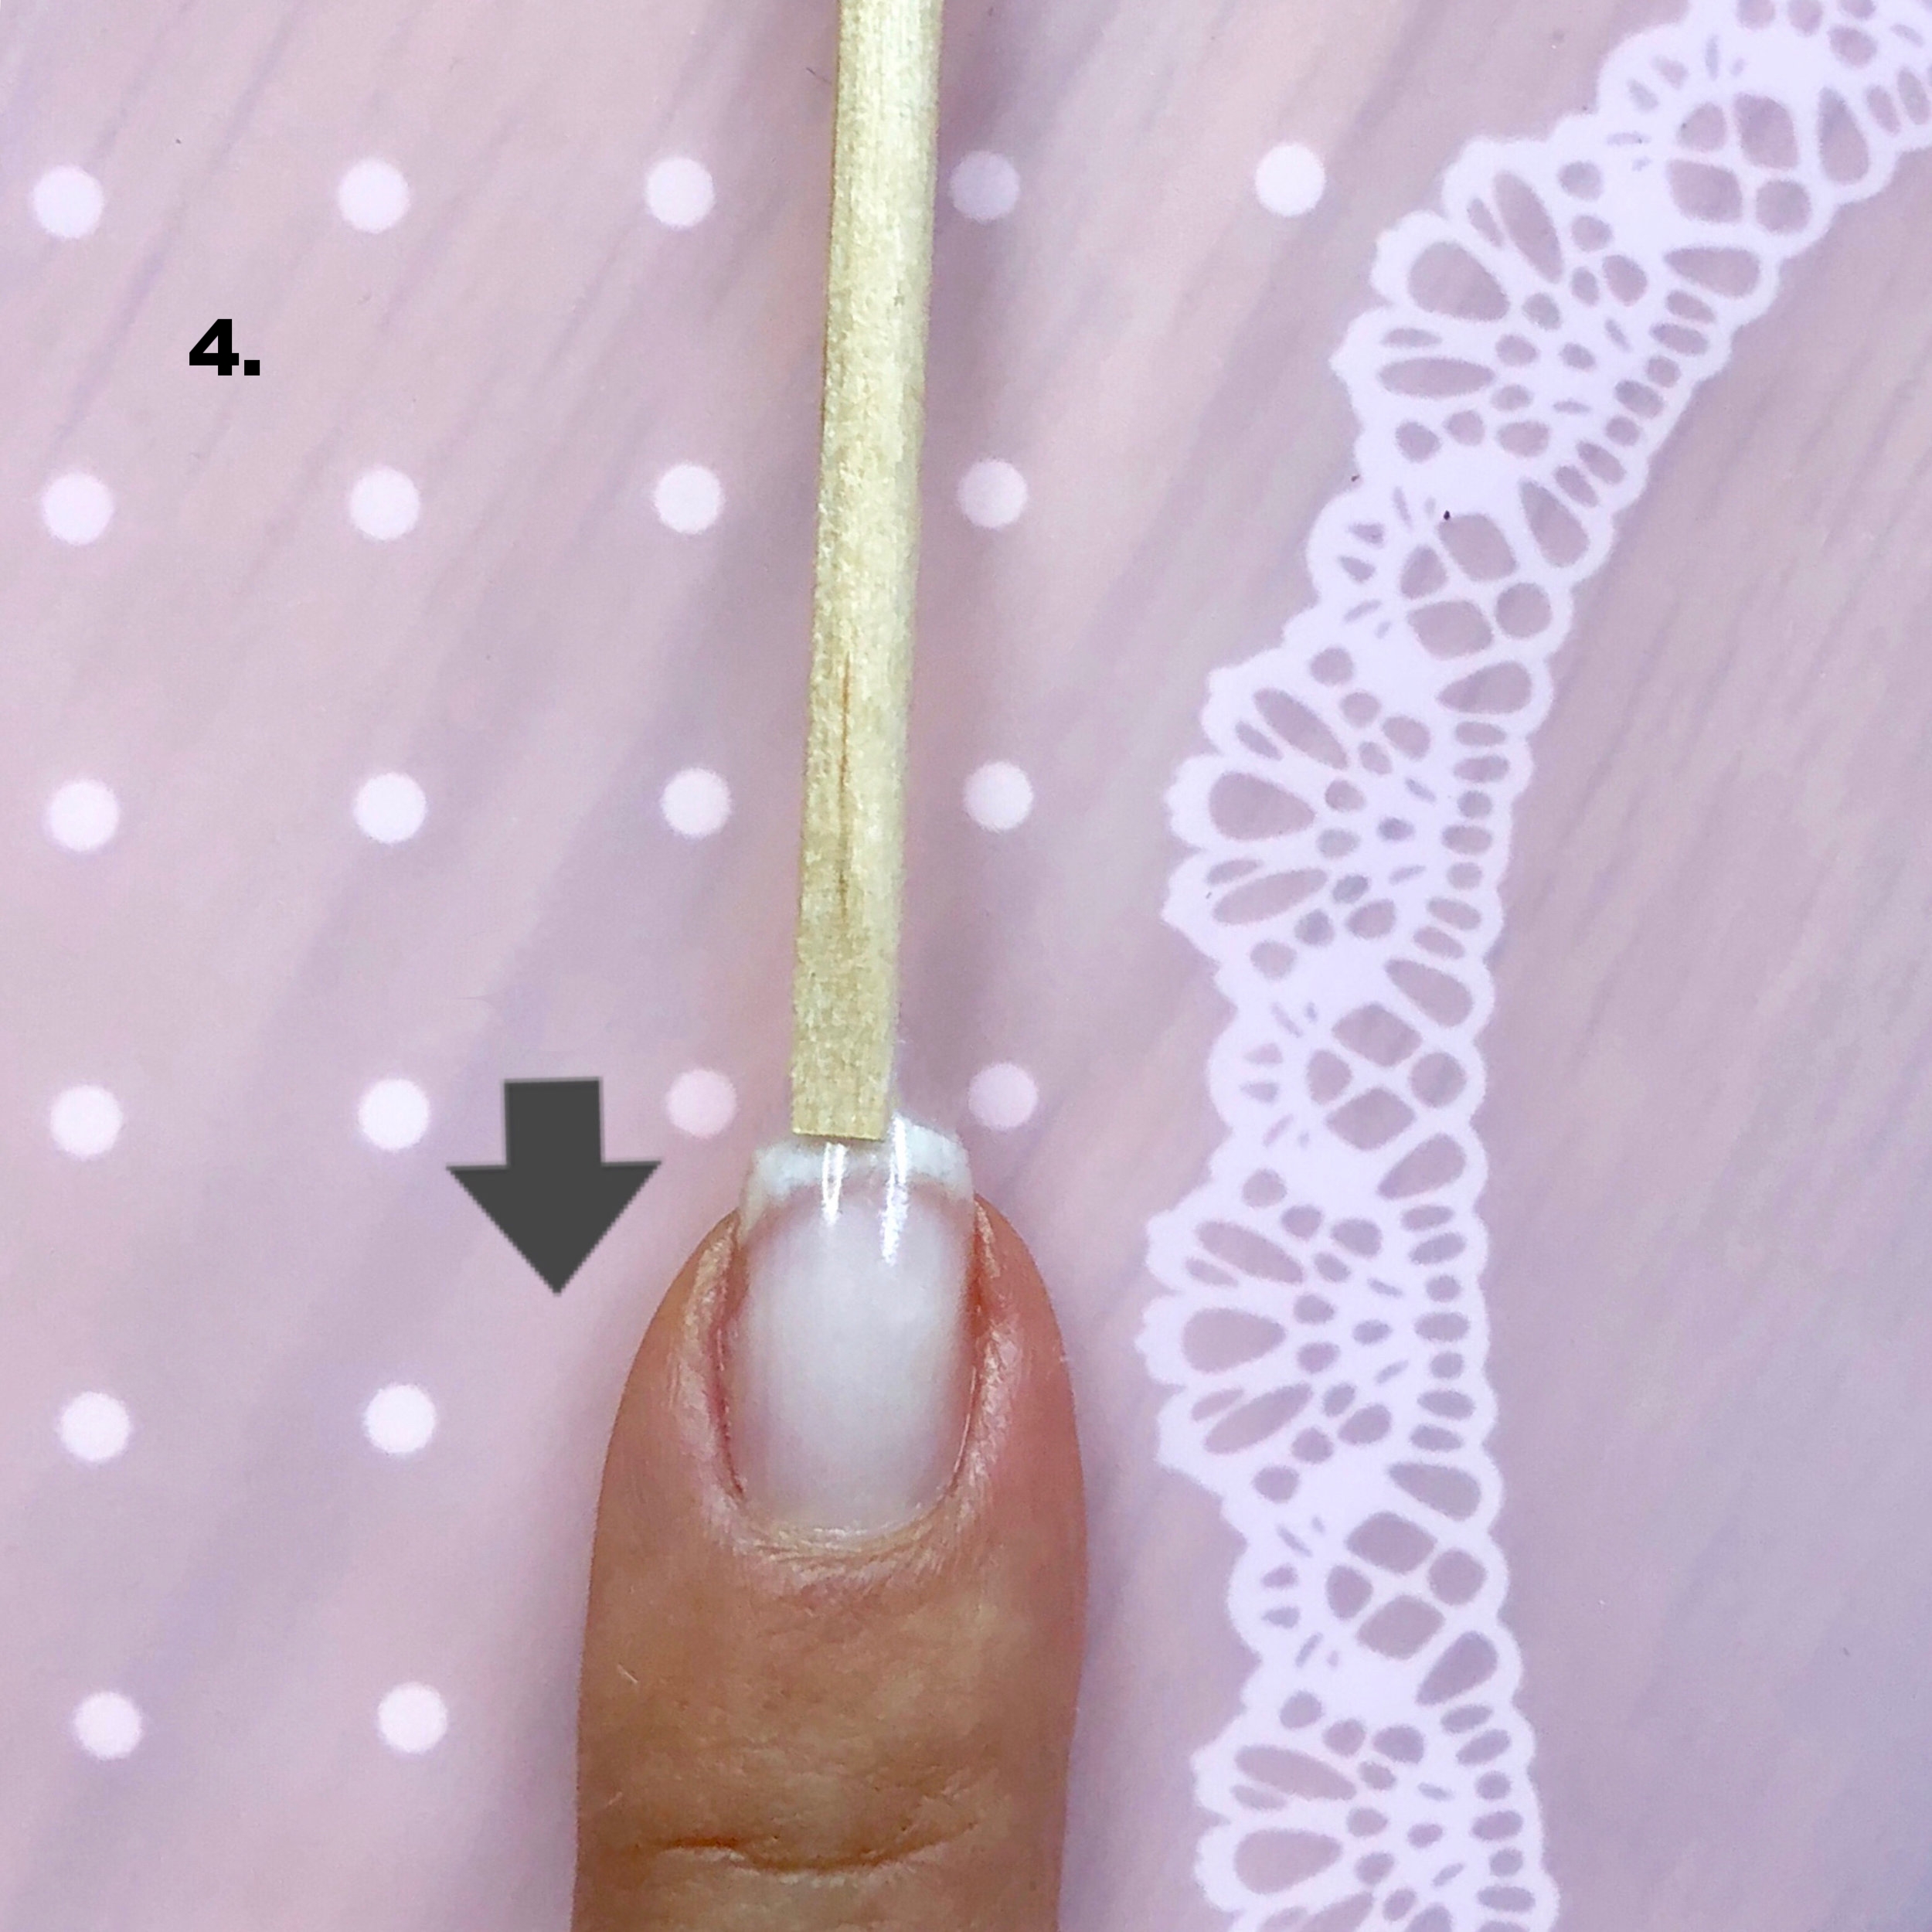
9. Using your orangewood stick, gently scrape away the loosened gel towards the free edge only. Never push back towards the cuticle as you're working "against the grain" of the nails and that is how damage is caused as they are in a delicate state post-acetone. JK Beauty Tip: Also never use a metal pusher here - its too damaging on the delicate nail plate until the acetone has completely evaporated.
10. If any gel is left over, you can repeat the steps above or use a fine, 220-400 grit file to gently remove the rest of the gel. Buff gently with the padded buffer and cuticle oil to create a smooth surface
11. Smile because you have removed your gel damage-free :)

All gels perform and remove differently so some may come off faster and some slower. Let me know in the comments how you do and how my tips have helped you!
Lots of Nail Love,
Julie xo