I Got the Craziest Manicure in Brazil
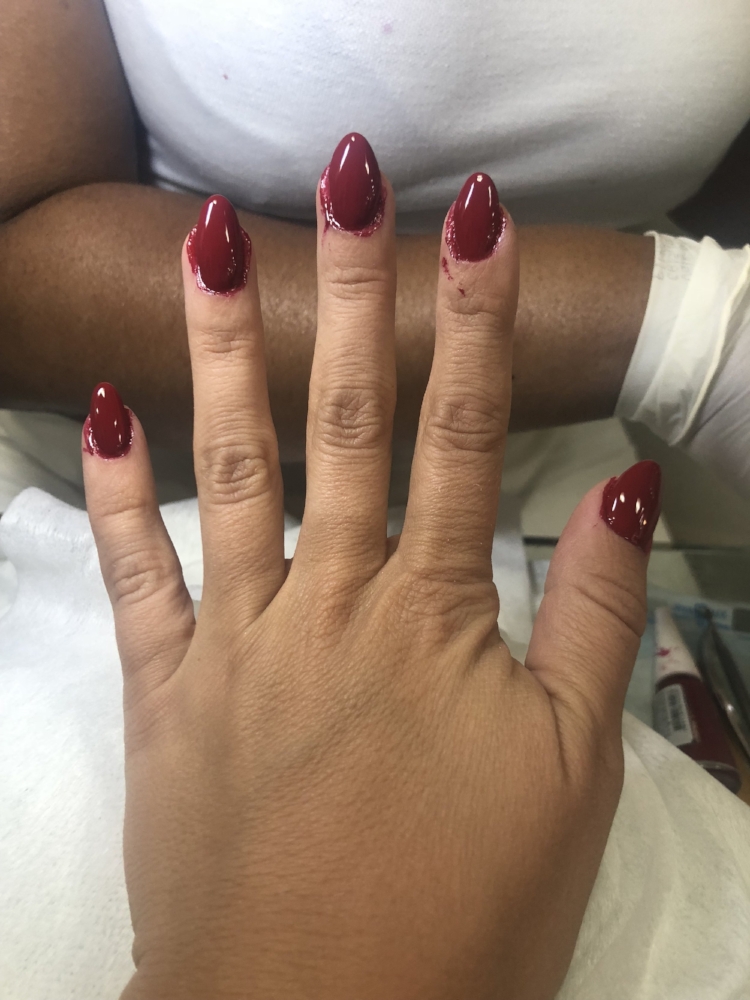
Comments on this photo ranged from “did they sneeze?” to “why cant they be precise?” to “horrific”. Ouch. But this proves exactly why I wanted to do a post on this type of manicure for you guys!
The first time I heard about the Brazilian manicure, I was told two things - they remove ALL of the cuticle*, and they polish “all the way up to the knuckle”. Um - what? So I was dying to go to Brazil to do in-person research on this elusive Brazilian Manicure technique - it perfectly combines everything Julie Off Duty is: beauty and travel.
I found myself with the time to skip down to Rio this month to research this (one of my fave/most memorable cities in the world), and let me tell you - this manicure technique is SO different from anything we’ve seen in the States - or anywhere else I’ve been to be honest and I couldn't wait to report back. Eep!
This was after my technician in Rio, Ana quite literally slapped on base coat and two thick coats of polish:
*Let’s chat about “cuticles” for a moment. The cuticle comes from underneath the eponychium - the skin at the base of the nail. There are a ton of technical articles on this - so to keep it simple here I’m just going to use the word “cuticle” when speaking about the area behind the nail plate.
Just ignore my gel manicure underneath!
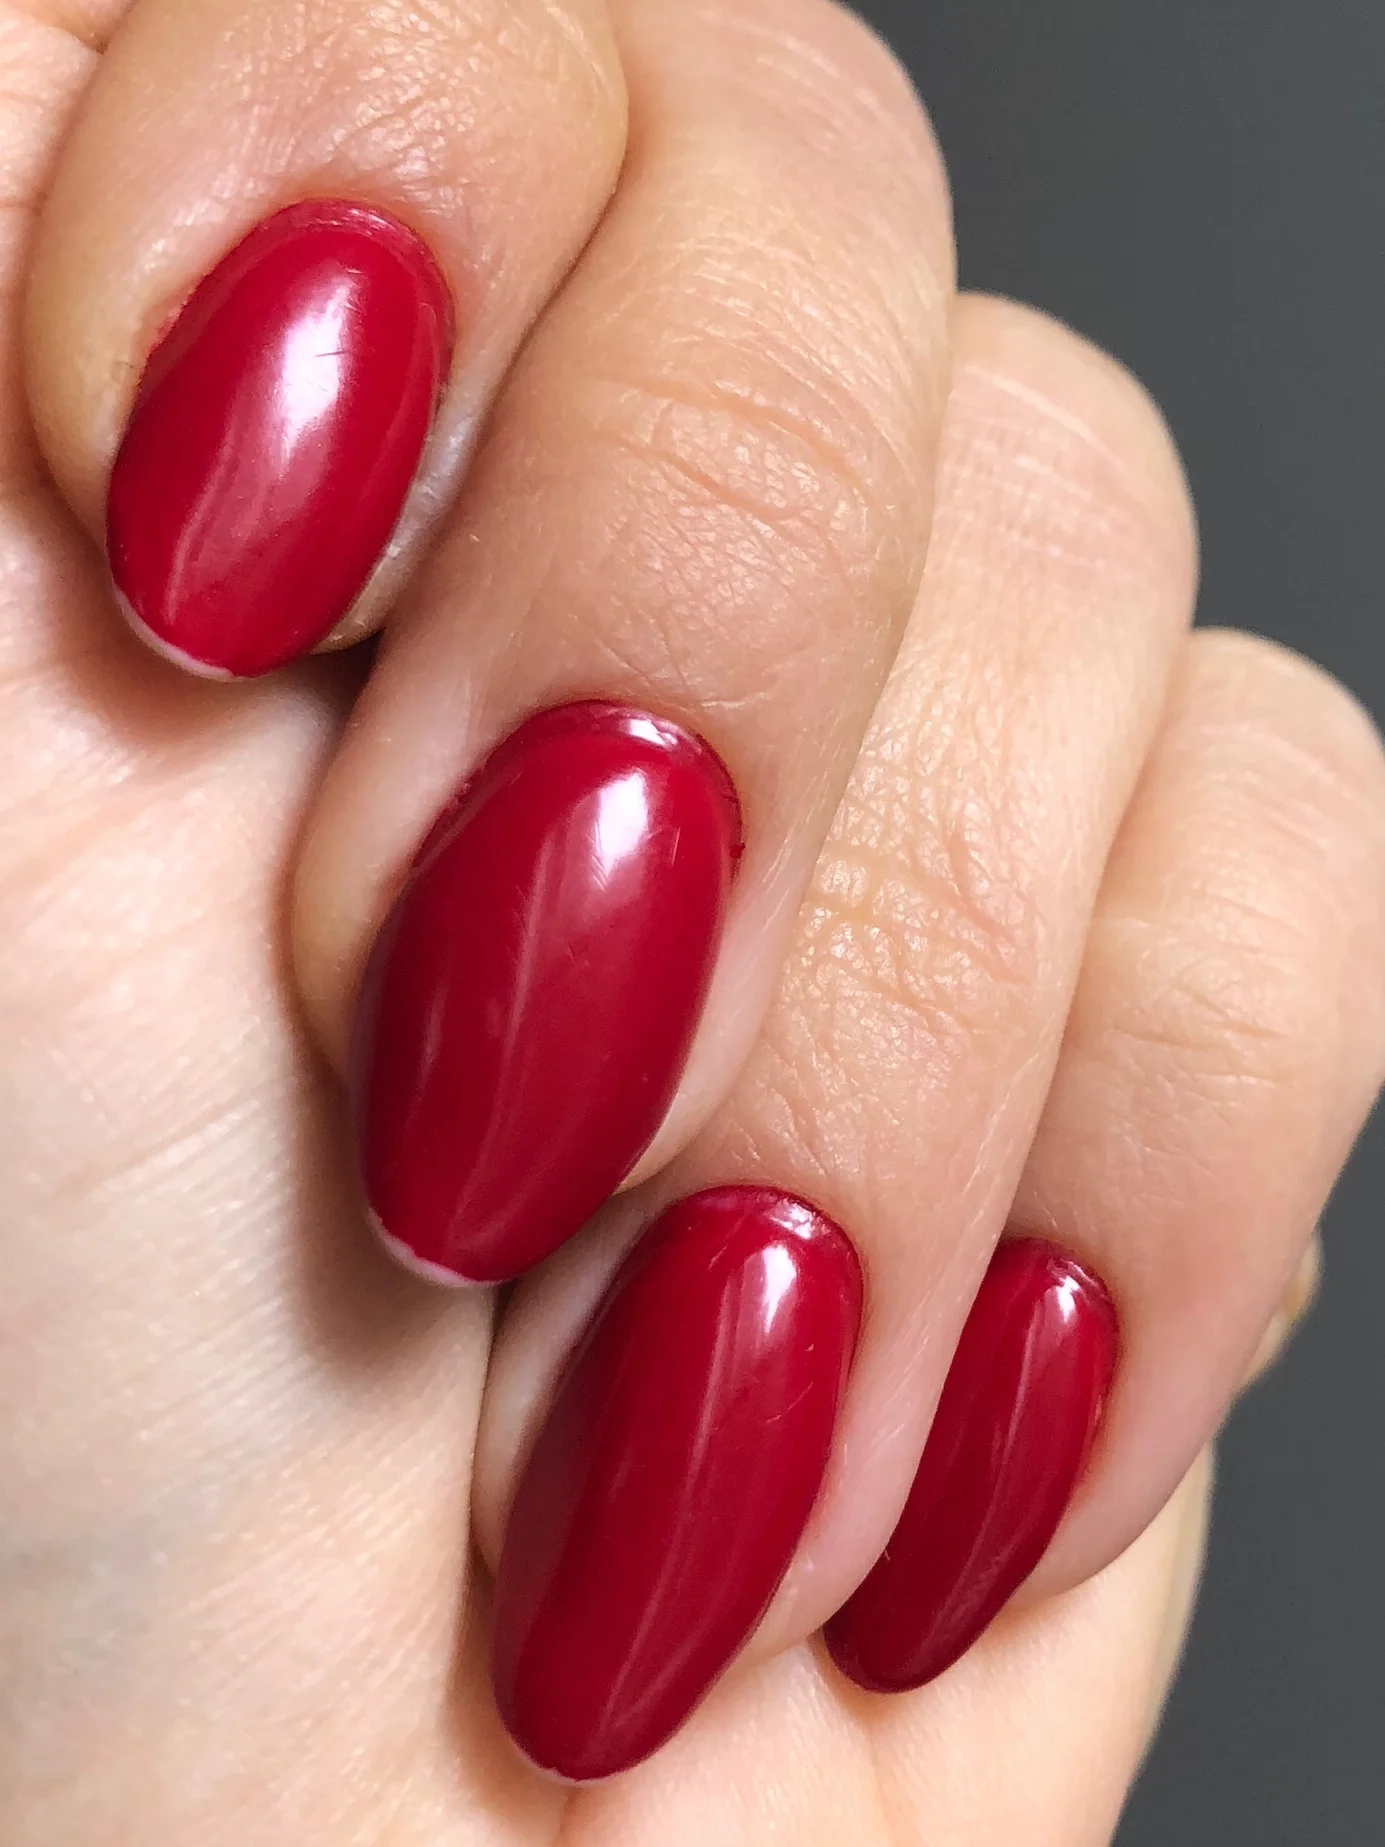
But here’s the thing - the nail is meant to be polished like that, because with that “careless” technique, the polish is able to get alllll the way into the folds of the nail, so that it lasts WAY longer as it grows out. The pic here is five days post mani- and there’s still NO visible growth. (Note: I am wearing gel underneath from my recent Russian manicure - hence the line of demarcation and wear on the tips).
Update: I am at day 7 post-manicure as I write this and there is still NO visible line of growth!
So how did we get from “messy halloween nails” to crisp, clean cuticles?
Step 1: Manicure. I had gel on from a previous manicure that I didn’t want to remove, so I just had her do my cuticles and polish.
Step 2: Remove ALL cuticle. In the States, there are polarizing opinions about removing cuticles or not or cuticle vs. eponychium (technical term) but again - let’s just keep it simple and say they trim all the excess skin away to leave a flat and clean surface. This is done so that the polish doesn’t stain the skin, and it can seep all the way into the lateral (side) and proximal (center) folds of the nail - which gives it the massive longevity as the nail grows out.
Step 3: Prep the nail. There was barely any cleansing of my nail plate before polish and this totally surprised me! But on day 5 I’m still going strong… she did however slap on a thick base coat in the same fashion as the color.
Step 4: Polish. Of course I had to choose a blood red polish because it would show up in photos the best (and who doesn’t love a red nail?). Hence the Halloween nails comments! Ana applied it in a way I can only describe as… careless? I knew where this mani was going though - but if you didn’t know what was happening next, you’d be more than a little concerned!
Step 5: Cleanup. And now… the drumroll-worthy cleanup. Even this was done in such a unique way that I could not wait to share some tips on it. Ana used what at first glance looked like a a regular ol’ birchwood stick you see at every nail salon. But upon further research (which includes me beauty shopping, natch), I learned that they’re not just any wooden sticks. Here’s the breakdown:
Classic birch wood sticks: these are made of common white birch. On the hardness scale, birch rates a 1260 - pretty soft by comparison. The cleanup tools used in Brazil are frequently made of a Brazilian redwood called Paraju: a 3500 on the hardness scale - and one of hardest in the world. That allows the contact point to be extraordinarily precise (like, checked-baggage-sharp) and much less porous (aka less prone to germs) than birch wood. #themoreyouknow
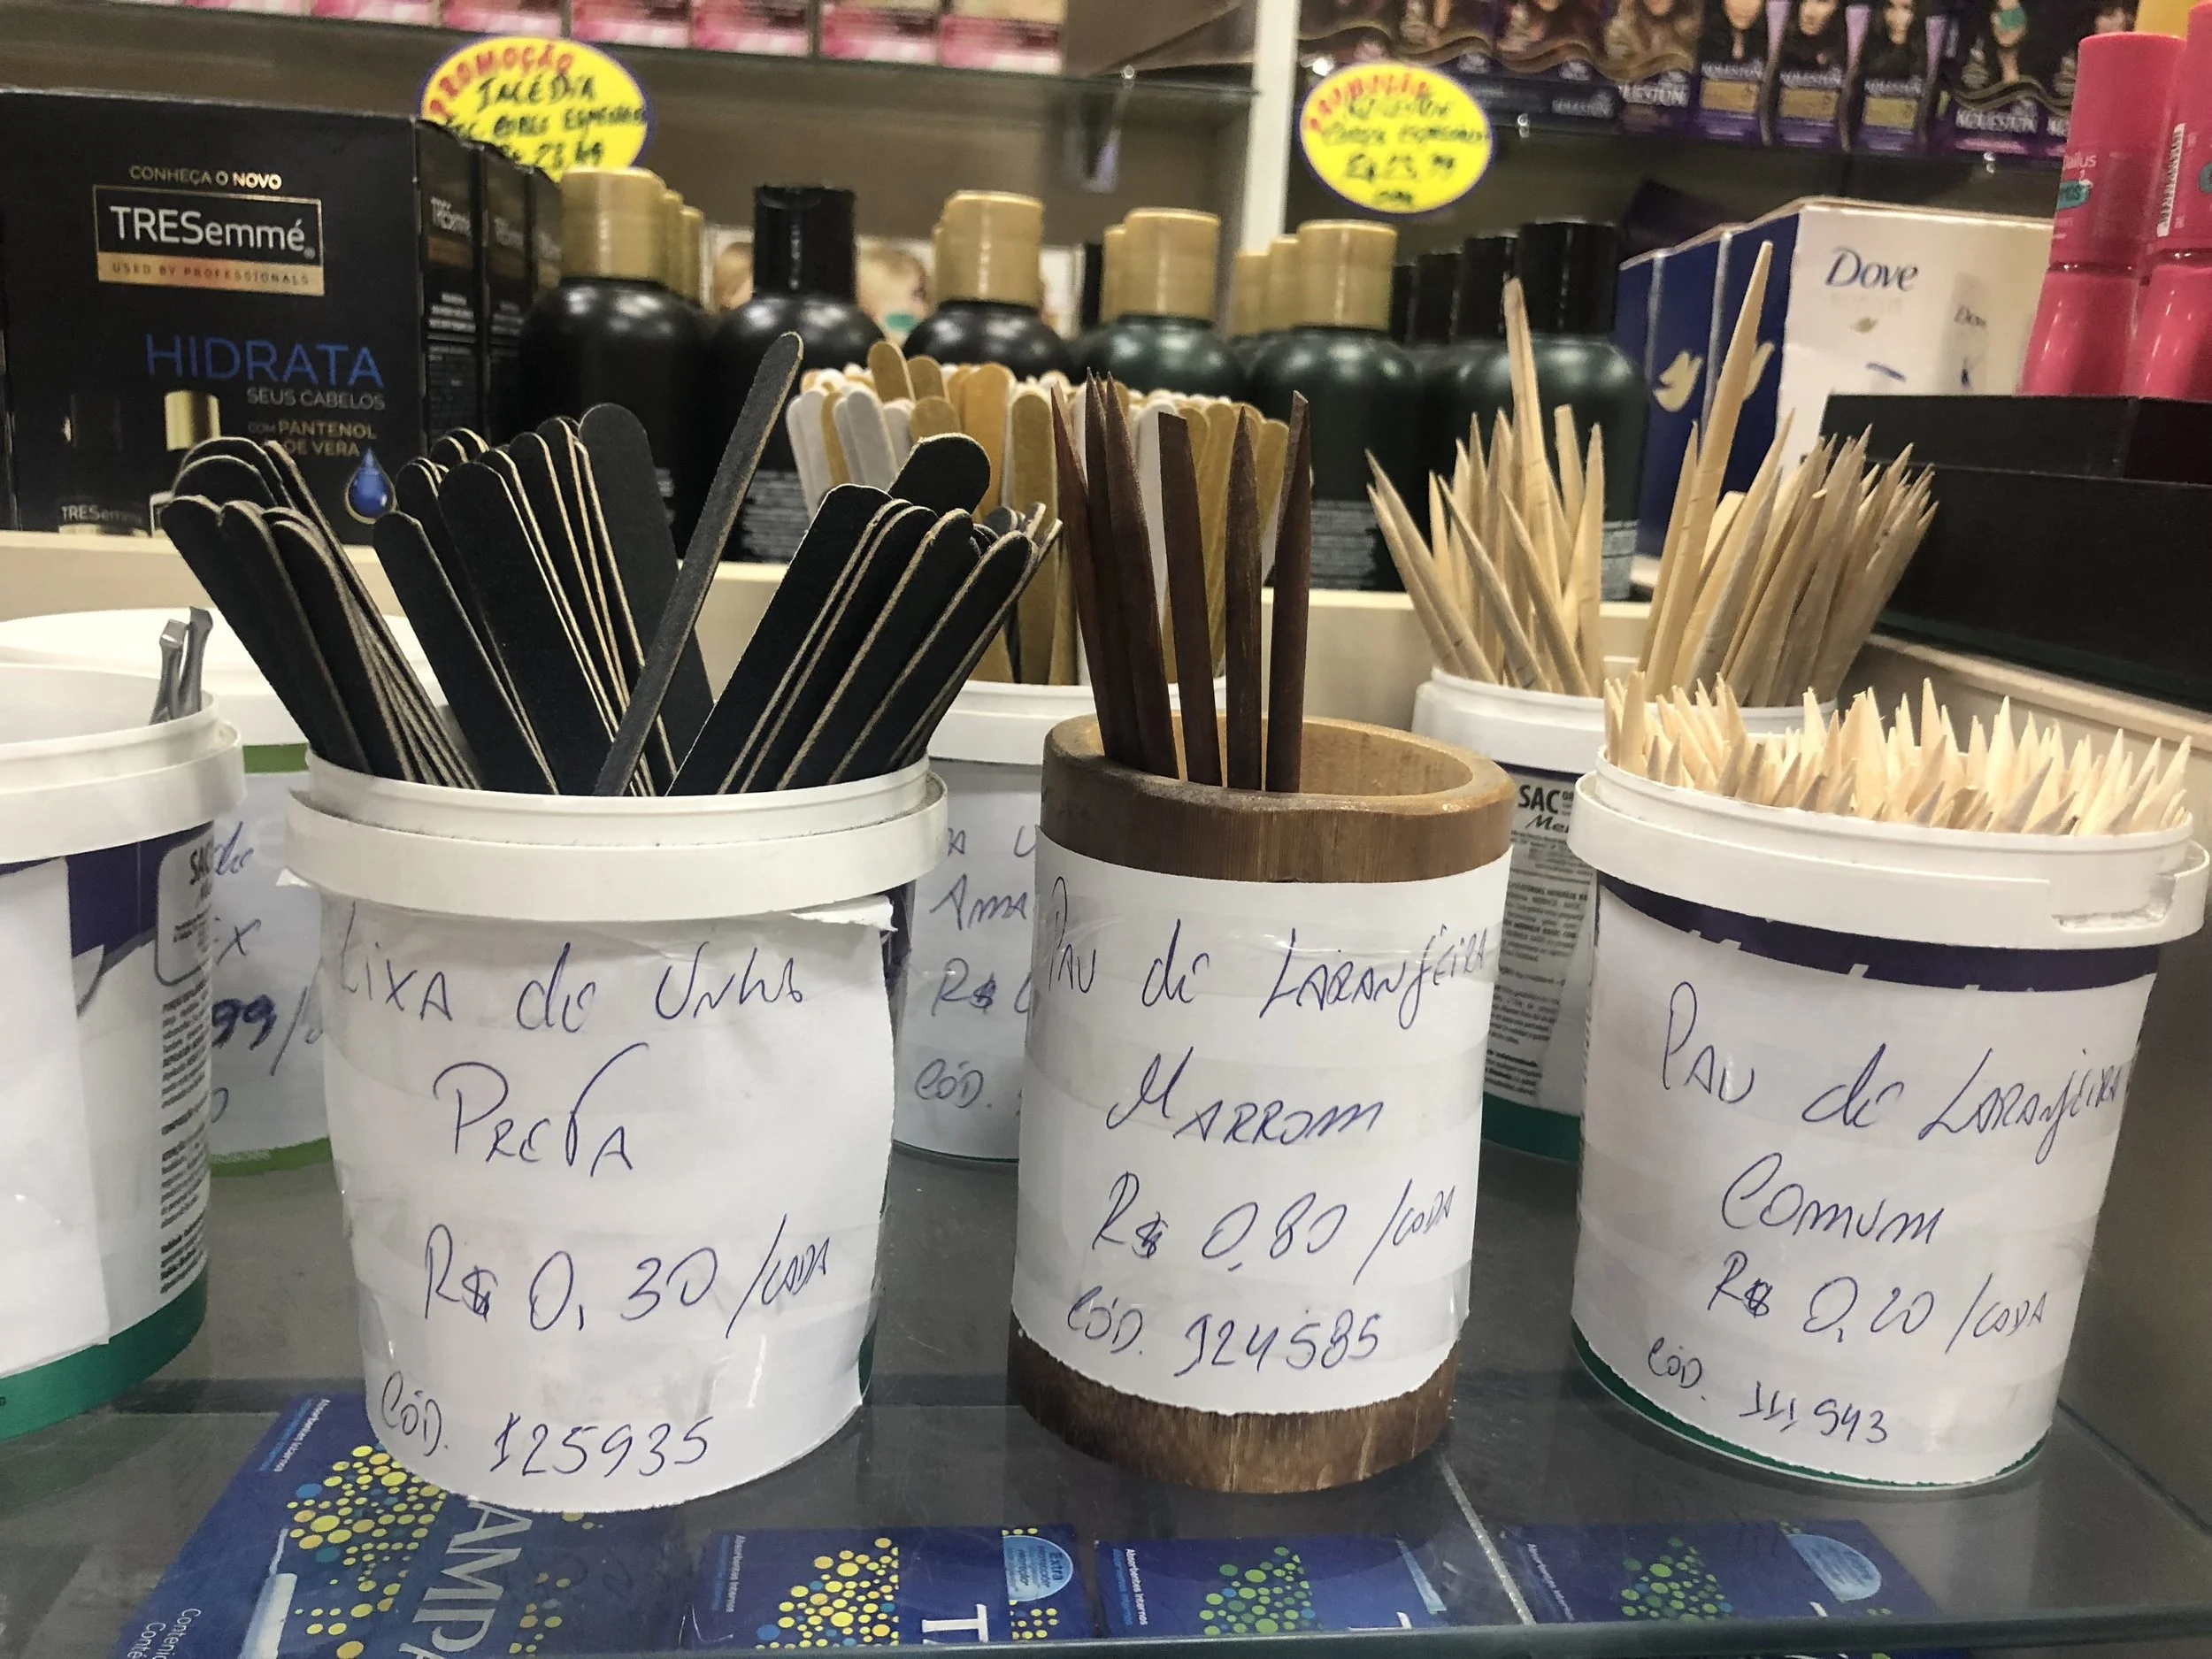
The cuticle sticks in the center are .80 reais - or 20 cents USD. The cheaper, disposable ones on the right are .20 reais - or 5 cents each.
So anyways, Ana took her cuticle stick and wrapped a moderate amount of cotton on it and dipped it in acetone polish remover. And that’s where the magic began - she held it flat against my cuticle and used a twirling motion to remove the excess polish away from my skin. Think the way the huge fabric squeegee things inside a carwash work. The cotton was replaced in a flash when it got full, so that there was no staining.
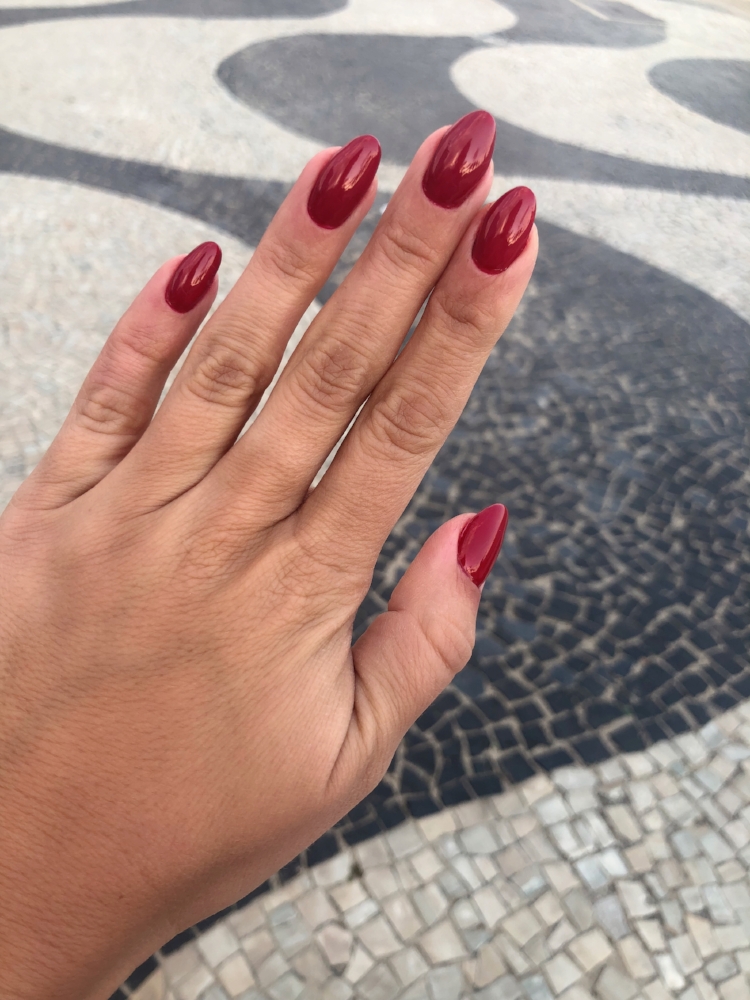
Step 6: Topcoat - or not? Before I knew what was happening, Ana sprayed on a healthy coat of aerosol speed-dry spray in lieu of topcoat. (shrug). It was too late to ask for regular topcoat so I went with it! They stayed super glossy until I took a nap a few hours later and got a little print from my jeans in it - but no biggie as it kinda evened out after.
Final thoughts
I would say I am pro-Brazilian mani for those times when you need your manicure to last extra long like before a beach vacay or wedding. However, taking all your cuticle away every single time though will get you into having to remove it all the time as it will make it grow faster as it creates what your body thinks is a “wound”. So tread carefully if you’re not ready for that kind of commitment.
Are you pro- or con- Brazilian mani? Will you try this cleanup technique when you work (for my nail tech friends) or DIY your next mani? Tell me how it goes for you in the comments below!
Obrigada (thank you) for reading! ((hugs))